
Restoring Industrial Chic: A Guide to Painting Metal Gates and Wooden Fixtures
Share This Blog

Congratulations on getting your keys! If you are a new Housing & Development Board (HDB) Build-To-Order (BTO) flat owner in Singapore, you know that the renovation journey is filled with a million decisions. But there is one tiny room that leaves almost every homeowner scratching their head: the mandatory Household Shelter (commonly referred to as the bomb shelter).
By default, HDB hands over this room with completely raw, porous, and dusty concrete floors. It looks sterile, feels rough underfoot, and continually kicks up fine gray concrete dust that tracks right out into your beautifully renovated living room or kitchen. Naturally, you want to cover it up or paint it.
However, before you let loose your contractor or run to the nearest hardware store, you need to understand that the household shelter is not a regular storeroom. It is a highly regulated structural reinforcement designed for your survival. If you modify it incorrectly, you could face hefty fines from HDB or, worse, compromise your safety.
Let’s dive deep into the official HDB regulations, weigh the pros and cons of the three most 22 popular flooring options—epoxy coatings, vinyl planks, and ceramic tiles—and explain why an industrial-grade epoxy system from a trusted provider like Seamaster Paint Singapore is the absolute ultimate solution for this tricky space.
The Chemistry of Tropical Weathering: Metal vs. Wood b
Before grabbing a paintbrush, it is critical to understand that metal and wood react differently to the elements. They require entirely unique surface treatments before you apply your final decorative topcoat.
Here is a quick summary of the primary constraints:
- No Hacking Allowed: You are strictly forbidden from hacking or drilling into the internal walls, floor slab, ceiling, or the blast-resistant steel door. According to official HDB renovation guidelines, “No hacking of walls or floors is allowed within the Household Shelter.”
- No Heavy Structural Load: You cannot lay thick, heavy floor screeds or massive slabs of natural stone that drastically alter the weight or height of the room.
- Ventilation Controls: You cannot block the ventilation sleeve or modify the airtight rubber seal around the steel door frame.
Because hacking is completely illegal, you cannot remove the existing concrete floor. Whatever material you choose must sit cleanly on top of the raw slab without requiring structural damage.
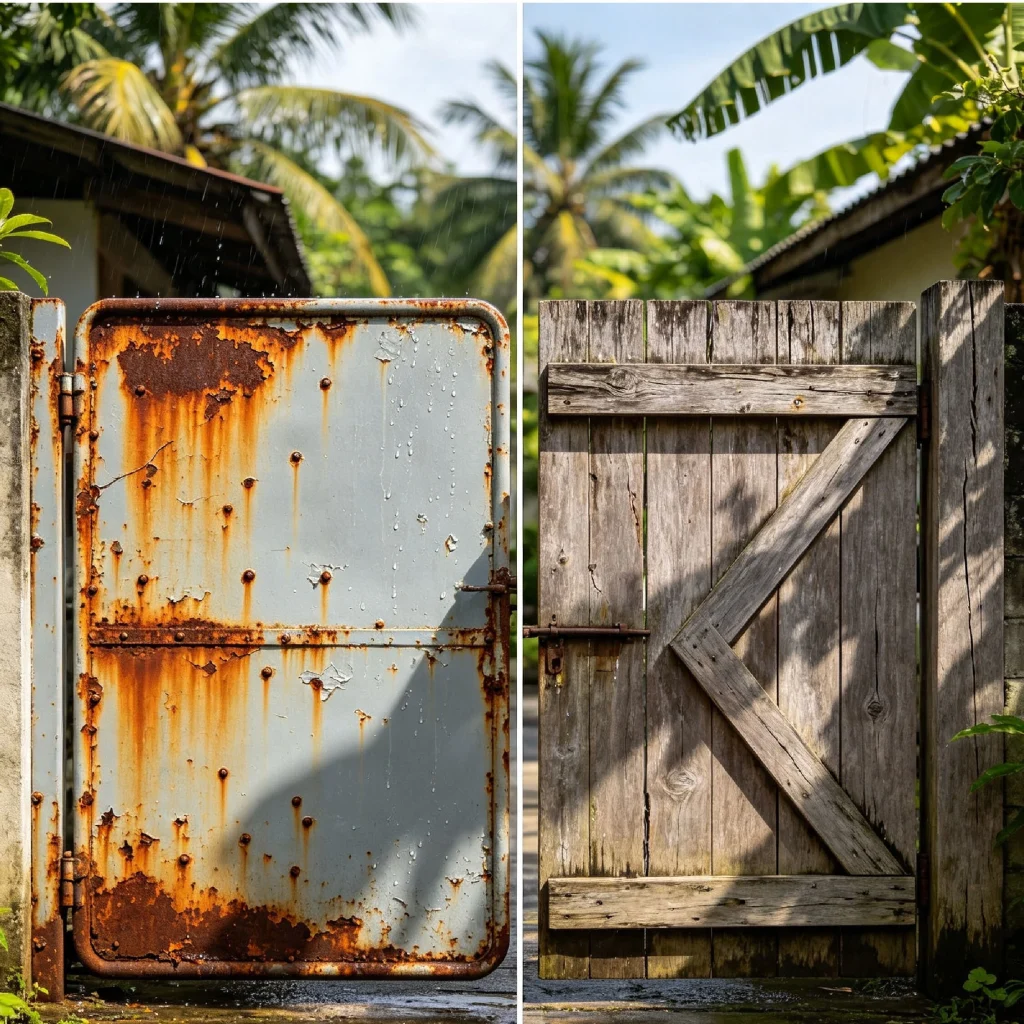
- The Metal Threat: Steel and iron gates are highly porous on a microscopic level. When wind shear drives rainwater against bare metal, moisture combines with oxygen to create iron oxide (rust). Rust expands, causing the underlying paint film to blister, crack, and flake away.
- The Wood Threat: Wood is an organic material that naturally expands when wet and contracts under heat. Constant exposure to extreme UV rays destroys the cellular structure of timber (called photo-degradation), making it brittle, grey, and prone to structural fungal rot.
To stop this damage, you must create an airtight, watertight barrier that moves with the substrate while locking out oxygen and damaging moisture.
Prepping Metal Surfaces (Eliminating the Corrosion)
Applying fresh paint directly over an active patch of rust is a recipe for failure. The corrosion will continue to eat away at the metal underneath, destroying your new paint layer within months.
- Scrape and Wire-Brush: Put on protective goggles and a dust mask. Use a heavy-duty wire brush or a stiff paint scraper to vigorously remove all loose paint chips, flaking debris, and thick chunks of rust from your gate or fence.
- Sand to Bare Metal: Use 120-grit sandpaper or a mechanical sander to smooth out the edges where the old paint meets bare metal. Sand until the rusted patches turn into bright, shiny silver steel.
- Degrease and Clean: Wipe down the entire metal surface with a clean cloth soaked in a mineral spirit or high-grade solvent cleaner. This completely removes hidden tracking dust, manufacturing oils, and fingerprint grease that would otherwise prevent your primer from bonding.
Prepping Weather-Worn Wood (Restoring the Grain)
Prepping wood requires a gentle yet thorough approach to ensure the timber pores are clean, dry, and receptive to protective coatings.
- Remove Old Coatings: If the wooden fixture has older, peeling varnish or flaking paint, sand it down using a medium-grit (80 to 120-grit) sandpaper. Always sand in the direction of the natural wood grain to avoid leaving deep, permanent cross-grain scratches.
- Treat Fungal Spores: If you spot dark grey or black discoloration on your outdoor wooden planters or screens, it likely indicates deep-seated fungal growth. Scrub these areas down with a specialized anti-fungal solution or a diluted bleach mixture, rinse with clean water, and let it dry out completely for a full day.
- Fill and Smooth: Inspect the timber for deep cracks or missing chunks caused by weather warping. Pack these gaps with an exterior-grade wood filler using a putty knife. Once cured, sand the patches down with 240-grit sandpaper until the surface feels flush and silky-smooth.
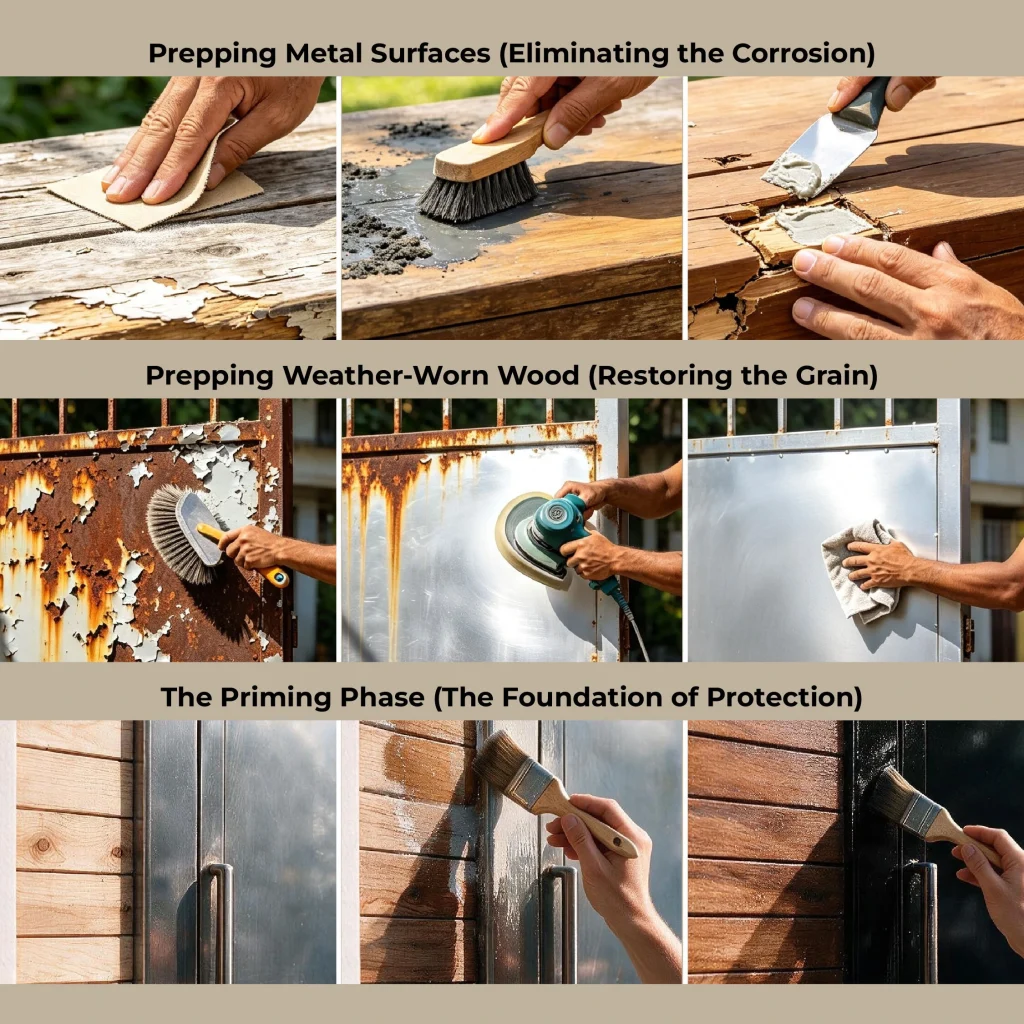
The Priming Phase (The Foundation of Protection)
Never apply your decorative topcoat directly onto bare metal or raw wood. Primers act as an essential bonding bridge, ensuring your paint sticks permanently while providing active defense against moisture.
- For Metal Protection: Apply one to two coats of an anti-corrosive primer, such as a high-solid zinc phosphate primer or red oxide primer. This chemically seals the iron, preventing moisture from reacting with the substrate even if the topcoat gets scratched down the line.
- For Wood Protection: Apply an oil-based wood primer or undercoat. Wood naturally drinks up liquid, so a high-quality undercoat seals the thirsty timber pores, prevents natural wood tannins from bleeding through to discolor your paint, and provides a uniform surface for your topcoat.
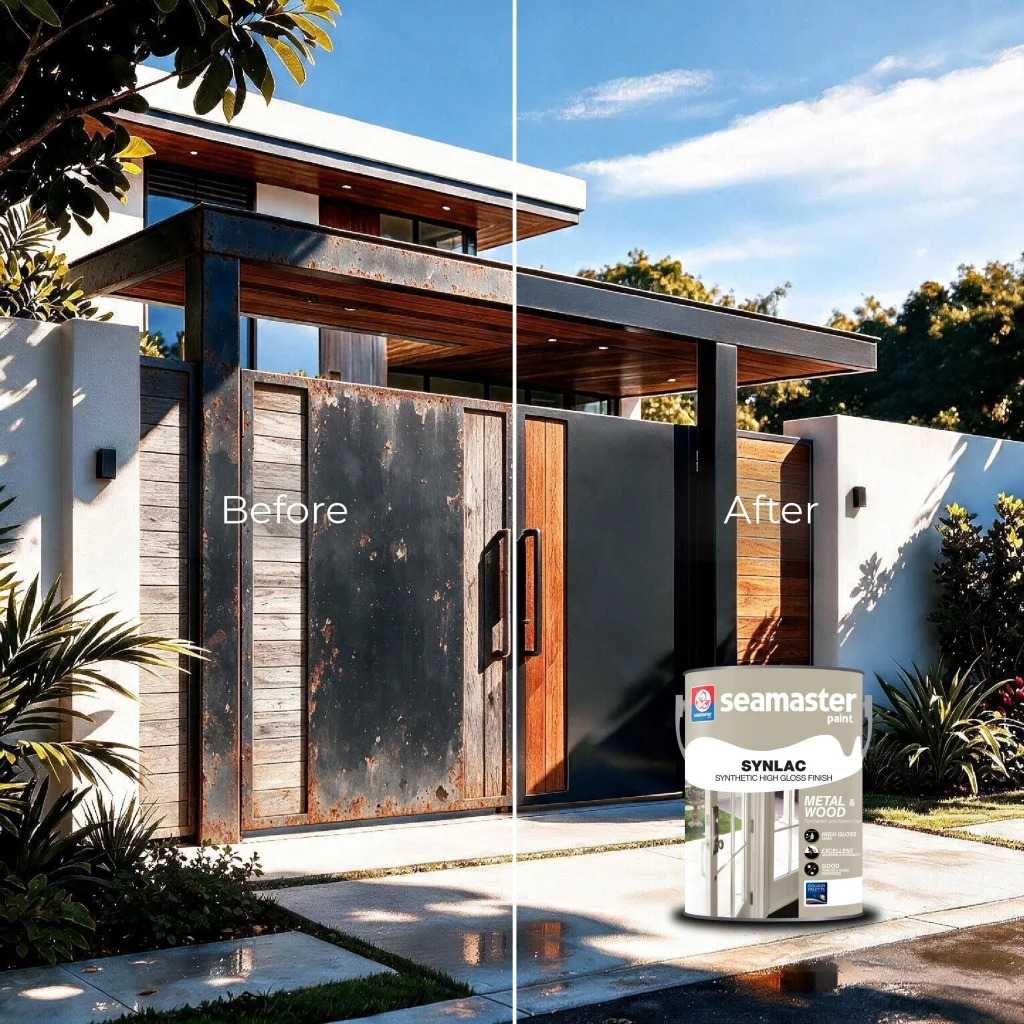
Why Seamaster Gloss Finish 9900 excels in Industrial Chic Design:
- High-Gloss Waterproof Shield: It cures into a slick, glass-like film that sheds rainwater instantly, preventing water pooling on horizontal gate bars or wooden ledges.
- Excellent Algae and Fungus Resistance: Specially treated to stop mould spores from taking root, ensuring your exterior fixtures look pristine throughout the monsoon season.
- Superb Levelling Properties: Formulated to flow smoothly across surfaces, minimizing brush marks and roller textures for a flawless finish.
Application Steps:
- Stir Thoroughly: Open your tin of Seamaster Gloss Finish 9900 and stir it with a clean mixing stick for 2 minutes to distribute the protective pigments evenly. If applying by brush or roller, the paint is typically ready to use straight out of the tin. If thinning is required for a spray gun, use a small amount of high-grade mineral thinned solvent.
- Cutting In and Rolling: Use a high-quality synthetic bristle brush to coat complex metal scrolls, hinges, and tight wooden joints first. For broad, flat panels or square gate bars, switch to a short-nap, solvent-resistant gloss roller sleeve to lay down the paint smoothly.
- Apply Two Thin Coats: Avoid applying one thick, heavy layer, as this leads to sagging, dripping, and an uneven cure. Lay down one thin, consistent coat. Allow it to dry for at least 6 to 8 hours before lightly sanding with fine 400-grit sandpaper to remove minor dust nibs. Wipe away the dust and apply your second coat for maximum depth, deep color enrichment, and multi-year protection.
Get Your Materials at Authorized Seamaster Stockists Today!
Transforming your worn-out exterior fixtures into a striking industrial chic showcase is an incredibly rewarding weekend project. By taking the time to prep your surfaces correctly and sealing them with premium coatings, you preserve the structural integrity and beauty of your home through any tropical season.
Don’t guess which primers, thinners, or tools you need for your specific metal alloy or timber type. Head over to our official Seamaster Paint Malaysia Homepage to explore detailed product catalogs, or drop by your nearest neighborhood distributor! Visit our local authorized Seamaster stockists and hardware partners across Malaysia today to consult with our technical specialists, secure professional color matching, and pick up your complete weatherproofing toolkit!
[1] https://schoolofwoodcarving.com
[2] https://www.wood-finishes-direct.com

Teo Fei Guak - SMP Colour & Paint Specialist
Sharing practical house painting tips, smart techniques, and real-world industry insights.
Table of Contents
- Restoring Industrial Chic: A Guide to Painting Metal Gates and Wooden Fixtures
- The Chemistry of Tropical Weathering: Metal vs. Wood
- Prepping Metal Surfaces (Eliminating the Corrosion)
- Prepping Weather-Worn Wood (Restoring the Grain)
- The Priming Phase (The Foundation of Protection)
- Why Seamaster Gloss Finish 9900 excels in Industrial Chic Design:
- Get Your Materials at Authorized Seamaster Stockists Today!